Spring Boot 2.x 入门:构建第一个Web应用程序
一、前言
1、本文主要内容
- 使用Maven-quickstart模板创建项目
- 修改pom.xml文件引入SpringBoot以及Spring MVC
- 通过Spring Boot输出helloworld
- 通过 start.spring.io 初始化Spring Boot项目
2、本教程环境信息
| 软件/环境 | 说明 |
|---|---|
| 操作系统 | Windows 10 |
| JDK | 11.0.x |
| Spring Boot | 2.3.0.RELEASE |
| IDE | IntelliJ IDEA 2019 |
| 浏览器 | Chrome 80+ |
3、前置知识
你可能需要的前置知识/准备工作
- Java语法学习
https://www.runoob.com/java/java-basic-syntax.html
- Java开发环境配置
https://ken.io/serie/java-quickstart
- Spring Boot介绍
https://baike.baidu.com/item/Spring%20Boot/20249767
https://spring.io/projects/spring-boot
二、构建项目
1、创建项目
使用Maven模板创建项目
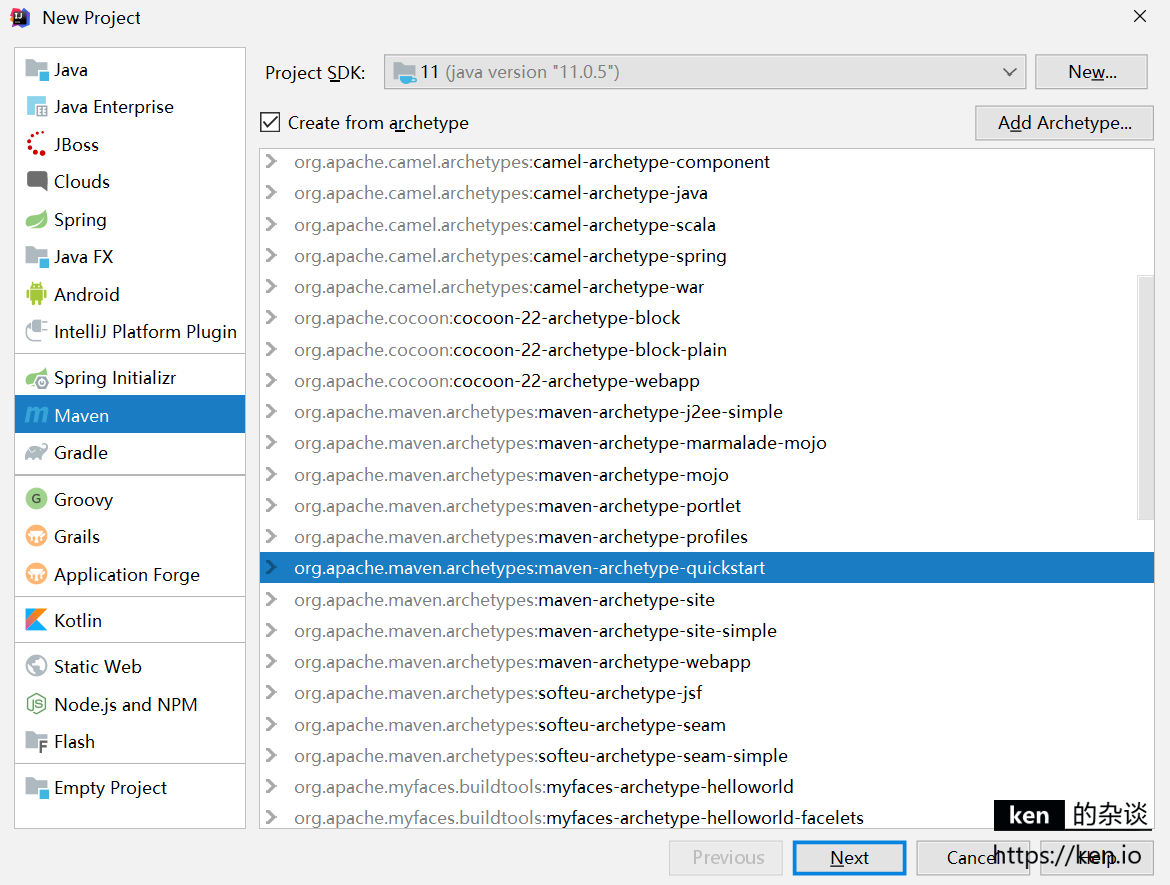
项目模板:maven-archetype-quickstart
GroupId:io.ken.springboot.tutorial
ArtifactId:helloworld
2、修改pom.xml
- 增加parent节点引入springboot
- 在dependecy节点中引入pring-boot-starter-web依赖以引入Spring MVC
- 修改maven.compiler指定JDK11
  <parent>
    <groupId>org.springframework.boot</groupId>
    <artifactId>spring-boot-starter-parent</artifactId>
    <version>2.3.0.RELEASE</version>
    <relativePath/>
  </parent>

  <properties>
    <project.build.sourceEncoding>UTF-8</project.build.sourceEncoding>
    <maven.compiler.source>11</maven.compiler.source>
    <maven.compiler.target>11</maven.compiler.target>
  </properties>

  <dependencies>

    <dependency>
      <groupId>org.springframework.boot</groupId>
      <artifactId>spring-boot-starter-web</artifactId>
    </dependency>

    <dependency>
      <groupId>junit</groupId>
      <artifactId>junit</artifactId>
      <version>4.11</version>
      <scope>test</scope>
    </dependency>
  </dependencies>
Ctrl + 鼠标左键点击 groupId/artifactId 可以查看引用的Packge的依赖等信息
3、配置应用程序入口
修改 io.ken.springboot.tutorial.App
- 增加
@SpringBootApplication 注解 - 以SpringApplication启动
package io.ken.springboot.tutorial;

import org.springframework.boot.SpringApplication;
import org.springframework.boot.autoconfigure.SpringBootApplication;

@SpringBootApplication
public class App
{
    public static void main( String[] args )
    {
        SpringApplication.run(App.class);
    }
}
4、创建HomeController
- 创建package:io.ken.springboot.tutorial.controller
- 创建控制器Class:HomeController
package io.ken.springboot.tutorial.controller;

import org.springframework.stereotype.Controller;
import org.springframework.web.bind.annotation.RequestMapping;
import org.springframework.web.bind.annotation.ResponseBody;

@Controller
public class HomeController {

    @RequestMapping("/")
    @ResponseBody
    String index() {
        return "Hello World! - ken.io";
    }
}
5、启动配置
菜单:Run->Edit Configurations
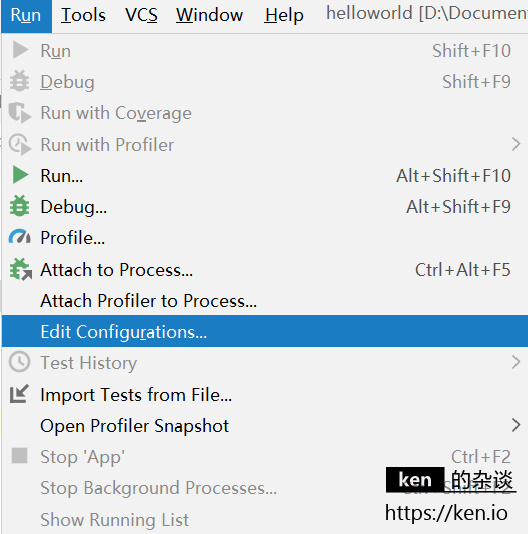
选择 Edit Configurations后会进入启动配置管理
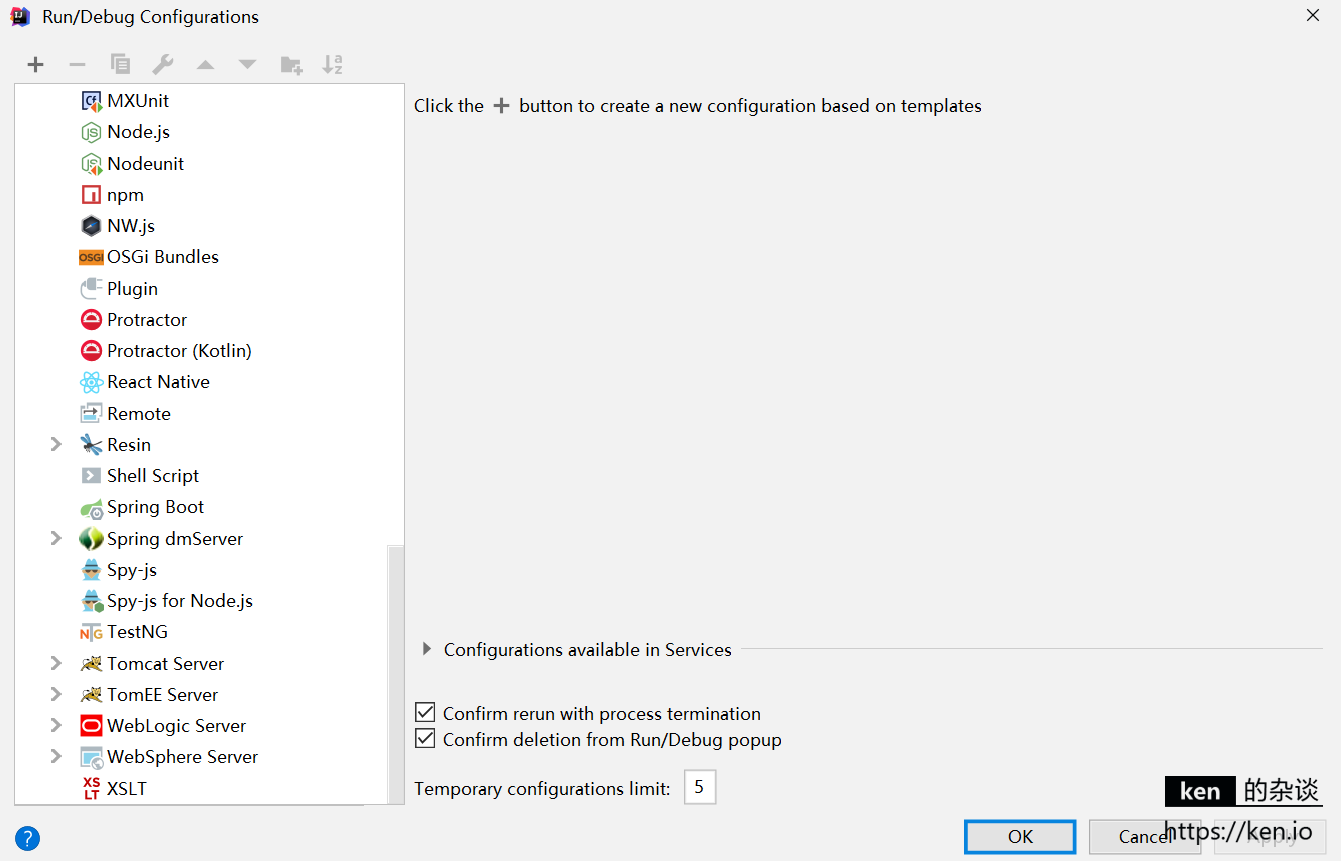
点击+号,选择Spring Boot模板,即可创建Spring 应用的启动配置
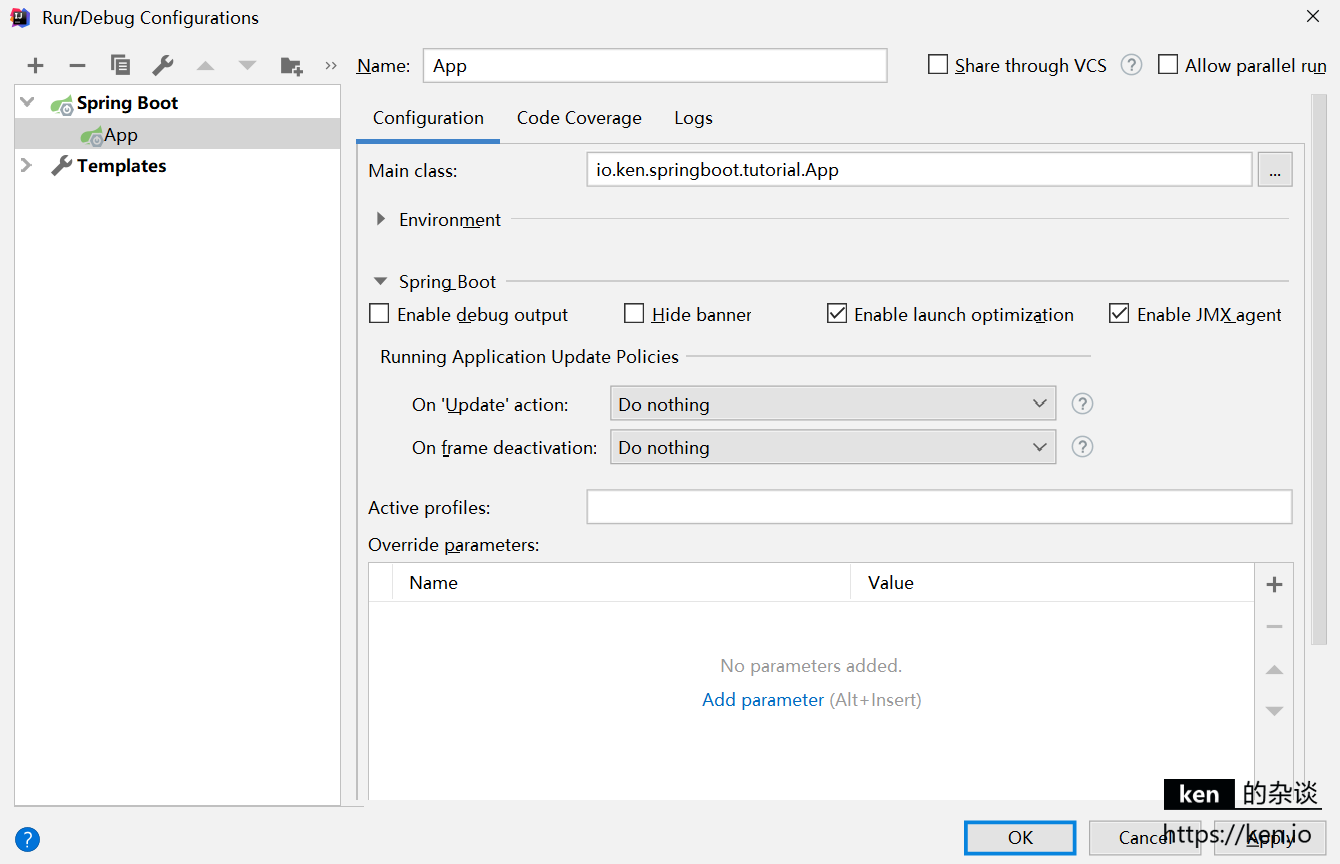
选择启动类(Main class),输入配置名称,点击OK即可完成启动配置
6、输出Hello World
启动项目
使用快捷键Shift+F10启动即可
(或者在启动类App编辑区域,使用右键菜单->Run “App”启动)
控制台输出片段:
[main] o.s.b.w.embedded.tomcat.TomcatWebServer  : Tomcat initialized with port(s): 8080 (http)
[main] o.apache.catalina.core.StandardService   : Starting service [Tomcat]
[main] org.apache.catalina.core.StandardEngine  : Starting Servlet engine: [Apache Tomcat/9.0.31]
[main] o.a.c.c.C.[Tomcat].[localhost].[/]       : Initializing Spring embedded WebApplicationContext
[main] o.s.web.context.ContextLoader            : Root WebApplicationContext: initialization completed in 905 ms
[main] o.s.s.concurrent.ThreadPoolTaskExecutor  : Initializing ExecutorService 'applicationTaskExecutor'
[main] o.s.b.w.embedded.tomcat.TomcatWebServer  : Tomcat started on port(s): 8080 (http) with context path ''
[main] io.ken.springboot.tutorial.App           : Started App in 1.535 seconds (JVM running for 3.263)
从输出的信息可以看出,Spring Boot也是跑在Tomcat中的,关键是本机不用安装也不用做任何Tomcat的配置。就可以跑起来。这一点就很爽了。想知道Spring Boot还依赖了那些组件,在Pom.xml文件中Ctrl+鼠标单击org.springframework.boot即可
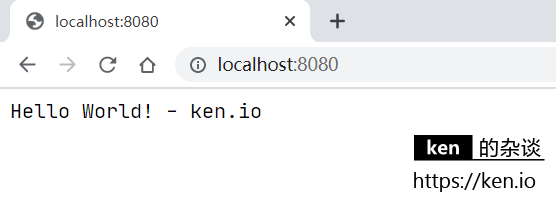
访问测试
项目启动后,访问 http://localhost:8080
更换端口运行
- 新建文件夹:/src/main/resources
- 使用右键菜单Mark Directory AS->Resources Root,将resources目录设置为配置根目录
在resources目录中新建配置文件application.properties
#监听端口
server.port=8081
项目启动后,访问 http://localhost:8081,即可
三、备注
Spring注解说明
| 注解 | ken.io的说明 |
|---|---|
@SpringBootApplication |
等价于使用@Configuration, @EnableAutoConfiguration 和 @ComponentScan默认属性的情况。 |
@Controller |
用于定义控制器类 |
@RestController |
等价于@ResponseBody和@Controller |
@RequestMapping |
用于定义路由,也就是Url与Controller方法的映射 |
@ResponseBody |
表示将结果直接填充到HTTP的响应体中,用于构建API |
@EnableAutoConfiguration |
将根据添加的jar依赖自动配置Spring,比如我们的应用依赖于spring-boot-starter-web,而它又依赖Tomcat和Spring MVC,有了这个注解,Spring boot将自动进行相关配置 |
@ComponentScan |
表示将该类自动扫描并注册为Bean |
@Configuration |
用于定义配置文件类,可以将配置类替换xml配置 |
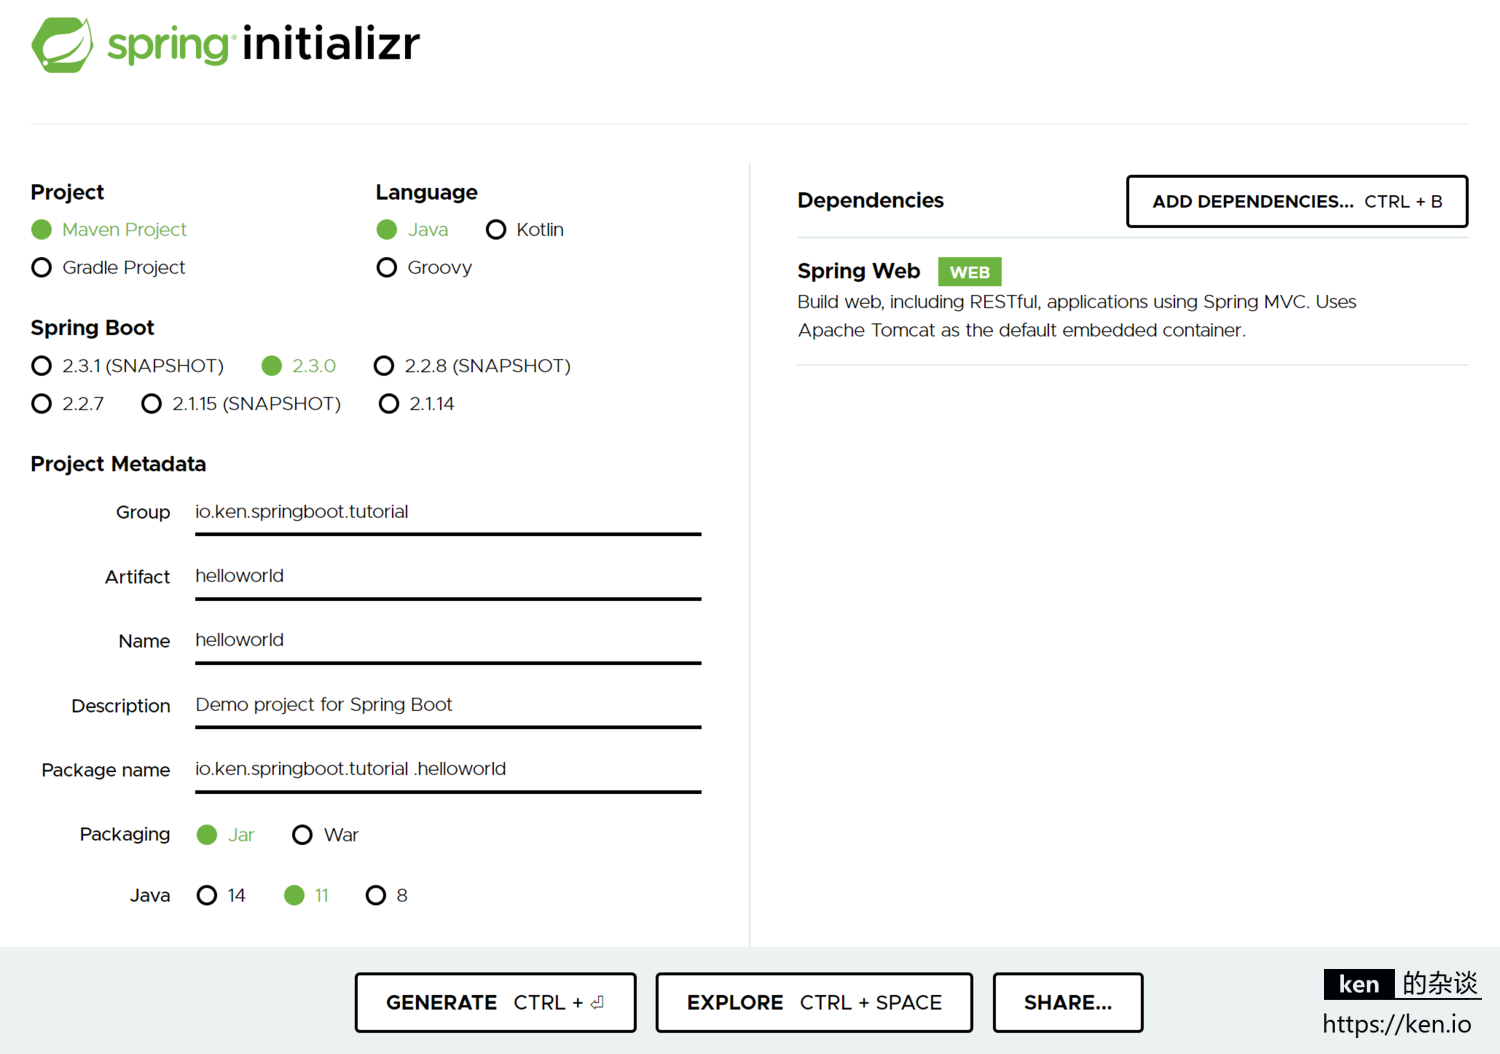
快速初始化项目
Spring官方提供了快速初始化项目的工具:https://start.spring.io/
可以在线选择Spring Boot版本,设置Project Matadata,选择项目依赖,然后点击Generate按钮下载
阿里云也提供了在线的初始化工具: https://start.aliyun.com/
附录
- 本文代码示例
https://github.com/ken-io/springboot-tutorial-2.x/tree/master/helloworld