CentOS 7 下 GitLab安装部署教程
一、前言
1、本文主要内容
- GitLab社区版部署
- GitLab配置禁用创建组权限
- GitLab配置邮件(SMTP)
- GitLab常用命令说明
2、GitLab介绍
GitLab一个开源的git仓库管理平台,方便团队协作开发、管理。在GitLab上可以实现完整的CI(持续集成)、CD(持续发布)流程。而且还提供了免费使用的Plan,以及免费的可以独立部署的社区版本(https://gitlab.com/gitlab-org/gitlab-ce )。
3、本篇环境信息
- 服务器
| 服务器名 | 操作系统 | 硬件配置 | IP | 说明 |
|---|---|---|---|---|
| GitLab | CentOS 7 | 2C4G | 192.168.88.41 | 部署GitLab社区版 |
- 软件
| 工具/环境 | 版本 |
|---|---|
| GitLab | 社区版 11.1.4 |
二、准备工作
1、安准基础依赖
#安装技术依赖
sudo yum install -y curl policycoreutils-python openssh-server

#启动ssh服务&设置为开机启动
sudo systemctl enable sshd
sudo systemctl start sshd
2、安装Postfix
Postfix是一个邮件服务器,GitLab发送邮件需要用到
#安装postfix
sudo yum install -y postfix

#启动postfix并设置为开机启动
sudo systemctl enable postfix
sudo systemctl start postfix
3、开放ssh以及http服务(80端口)
#开放ssh、http服务
sudo firewall-cmd --add-service=ssh --permanent
sudo firewall-cmd --add-service=http --permanent

#重载防火墙规则
sudo firewall-cmd --reload
三、部署过程
本次我们部署的是社区版:gitlab-ce,如果要部署商业版可以把关键字替换为:gitlab-ee
1、Yum安装GitLab
- 添加GitLab社区版Package
curl https://packages.gitlab.com/install/repositories/gitlab/gitlab-ce/script.rpm.sh | sudo bash
- 安装GitLab社区版
sudo yum install -y gitlab-ce
安装成功后会看到gitlab-ce打印了以下图形

2、配置GitLab站点Url
GitLab默认的配置文件路径是/etc/gitlab/gitlab.rb
默认的站点Url配置项是:external_url 'http://gitlab.example.com'
这里我将GitLab站点Url修改为http://git.ken.io
也可以用IP代替域名,这里根据自己需求来即可
#修改配置文件
sudo vi /etc/gitlab/gitlab.rb

#配置首页地址(大约在第15行)
external_url 'http://git.ken.io'
3、启动并访问GitLab
- 启动GitLab
#重新配置并启动
sudo gitlab-ctl reconfigure

#完成后将会看到如下输出
Running handlers complete
Chef Client finished, 432/613 resources updated in 03 minutes 43 seconds
gitlab Reconfigured!
- 访问GitLab
将设置的域名DNS解析到服务器IP,或者修改本地host将域名指向服务器IP。
访问:http://git.ken.io
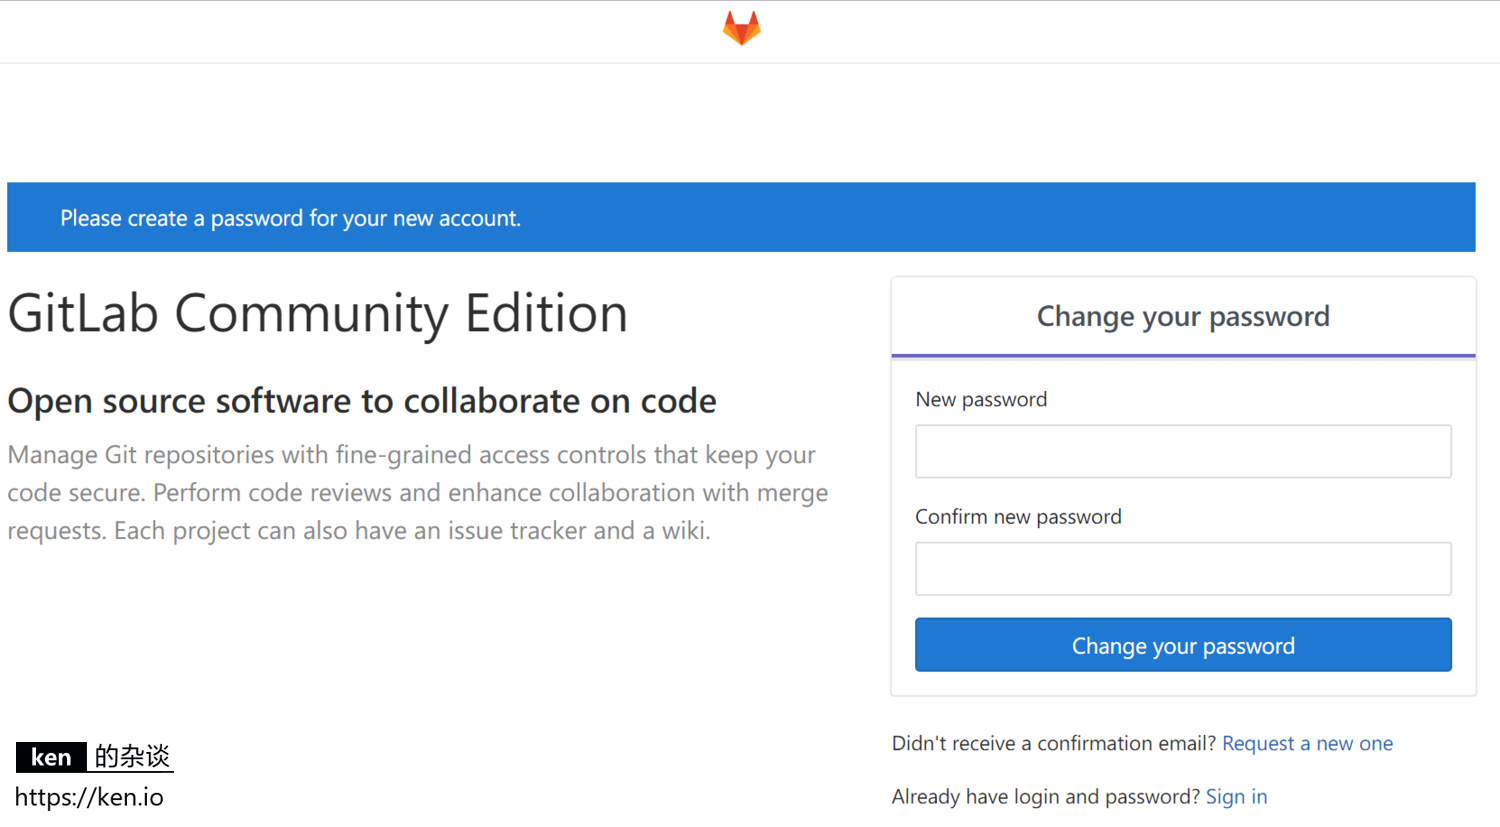
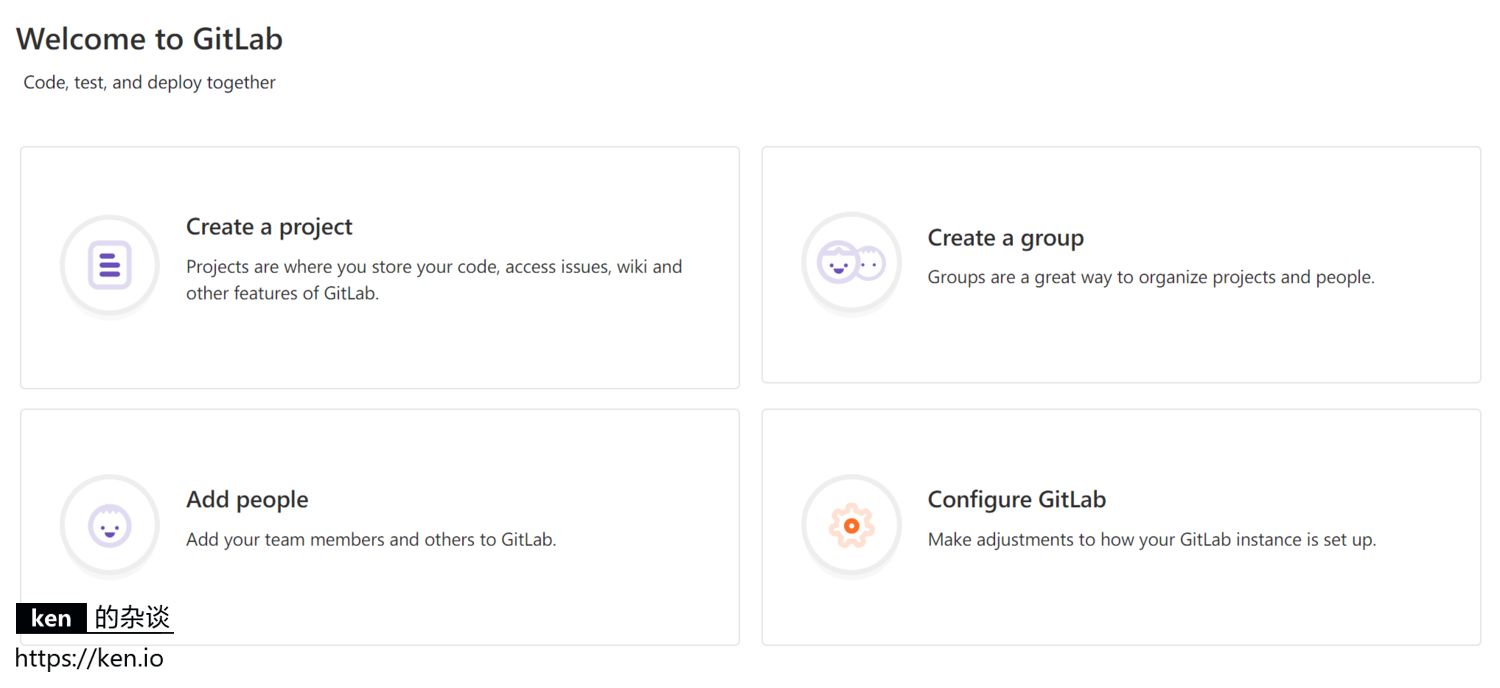
这时候会提示为管理员账号设置密码。管理员账号默认username是root。
设置完成之后即可使用root账号登录,登陆后会进入欢迎界面。
四、GitLab常用配置
1、邮件配置
配置邮箱可以让GitLab在发生相应事件的时候进行邮件通知
比如:找回密码、添加邮箱等
#修改配置文件
sudo vi /etc/gitlab/gitlab.rb

#邮件配置
gitlab_rails['smtp_enable'] = true
gitlab_rails['smtp_address'] = 'smtp.163.com'
gitlab_rails['smtp_port'] = 465
gitlab_rails['smtp_user_name'] = 'yourmail@163.com'
gitlab_rails['smtp_password'] = 'yourpasswd'
gitlab_rails['smtp_domain'] = 'smtp.163.com'
gitlab_rails['smtp_authentication'] = 'login'
gitlab_rails['smtp_enable_starttls_auto'] = true
gitlab_rails['smtp_tls'] = true
gitlab_rails['gitlab_email_enabled'] = true
gitlab_rails['gitlab_email_from'] = 'yourmail@163.com'
gitlab_rails['gitlab_email_display_name'] = 'Gitlab'

#保存后,重新配置并启动GitLab
sudo gitlab-ctl reconfigure
2、禁用创建组权限
GitLab默认所有的注册用户都可以创建组。但对于团队来说,通常只会给Leader相关权限。
虽然可以在用户管理界面取消权限,但毕竟不方便。我们可以通过配置GitLab默认禁用创建组权限。
#修改配置文件
sudo vi /etc/gitlab/gitlab.rb

#开启gitlab_rails['gitlab_default_can_create_group'] 选项,并将值设置为false
### GitLab user privileges
gitlab_rails['gitlab_default_can_create_group'] = false

#保存后,重新配置并启动GitLab
sudo gitlab-ctl reconfigure
3、gitlab-ctl常用命令介绍
| 命令 | 说明 |
|---|---|
| check-config | 检查在gitlab中是否有任何配置。在指定版本中删除的rb |
| deploy-page | 安装部署页面 |
| diff-config | 将用户配置与包可用配置进行比较 |
| remove-accounts | 删除所有用户和组 |
| upgrade | 升级 |
| service-list | 查看所有服务 |
| once | 如果GitLab服务停止了就启动服务,如果已启动就不做任何操作 |
| restart | 重启GitLab服务 |
| start | 如果GitLab服务停止了就启动服务,如果已启动就重启服务 |
| stop | 停止GitLab服务 |
| status | 查看GitLab服务状态 |
| reconfigure | reconfigure重新配置GitLab并启动 |
五、备注
- 本篇参考